
Building your own subwoofer box is a great way to get the bass you want while saving money and customizing your setup. But it’s not just about slapping some wood together. To make your sub sound great—and last—you’ve got to do it right.
Here’s a complete guide on how to build a subwoofer enclosure from start to finish.
Tools You’ll Need
Measuring & Cutting
- Measuring tape – For accurate box dimensions
- Straight edge or T-square – For marking straight lines
- Pencil or marker – For marking cuts and pilot holes
- Circular saw or table saw – For cutting MDF or particle board panels
- Jigsaw – For cutting the subwoofer hole and ports
Assembly
- Drill/driver – For screws and pre-drilling holes
- Drill bits – Match to screw size for pilot holes
- Countersink bit (optional) – To sink screw heads below the surface
- Clamps – For holding panels in place while gluing
- Screwdriver – Manual or powered for final tightening
- Staple gun – If applying carpet or vinyl
- Razor knife or carpet cutter – For trimming fabric cleanly
- Sanding block or power sander – For smoothing edges and surfaces
Finishing
- Paintbrush or roller – For paint or primer
- Spray adhesive (3M 77 or 90) – For attaching carpet or vinyl
- Caulking gun – If sealing with adhesive or sealant
- Shop vacuum – For cleaning dust during sanding and cutting
Materials You’ll Need
Box Construction
- MDF or particle board (5/8″ or thicker) – Main material for box panels
- Wood screws (2″–2.5″) – For assembly
- Wood glue or Liquid Nails – For sealing joints
- Wood filler – For patching screw holes and seams
- Bracing wood strips (3″–4″ wide) – For internal reinforcement
- Corner blocks – For added structural strength
- PVC tubing (if building a ported box) – For DIY ports
- Caulking to seal corners
Acoustic Enhancements
- Polyfill stuffing or fiberglass insulation – For internal damping
- Silicone sealant or caulk – To ensure airtight seals
- Speaker wire – To connect subwoofer terminals
- Terminal cup or binding posts – For wiring access on the outside of the box
- Soldering iron + solder (optional) – For secure speaker wire connections
Finishing Materials
- Carpet or automotive vinyl – For exterior finish
- Primer + paint (if painting) – For a clean painted finish
- Staples – To hold down fabric edges
- Rubber feet or padding (optional) – To prevent sliding or vibrations when installed
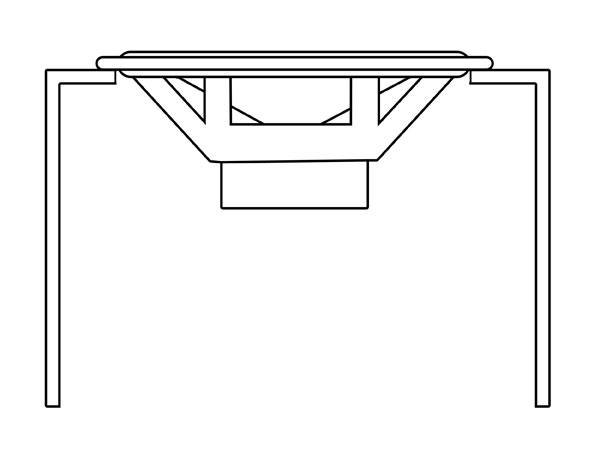
Step 1: Choose the Right Box Design for Your Sub
Before picking up a single tool, start with research.
- Check your subwoofer’s specifications. Every sub has a recommended box type (sealed, ported, etc.) and volume range.
- Don’t guess or “eyeball” the size. Using the wrong box can lead to poor sound and even speaker damage.
- Avoid overly complex shapes unless you’re experienced—they make volume calculation tricky.
Step 2: Pick Your Materials
A solid, airtight box is key for clean bass. Here are your options:
- MDF (Medium Density Fiberboard): The most popular choice. Use 5/8″ or thicker for strength and vibration resistance.
- Particle Board: Acceptable but slightly less durable than MDF.
- Plexiglas: Only use it if it’s 1/2″ thick or more. Great for showing off your build.
- Fiberglass: Ideal for custom shapes, but it’s messy, labor-intensive, and requires layering.
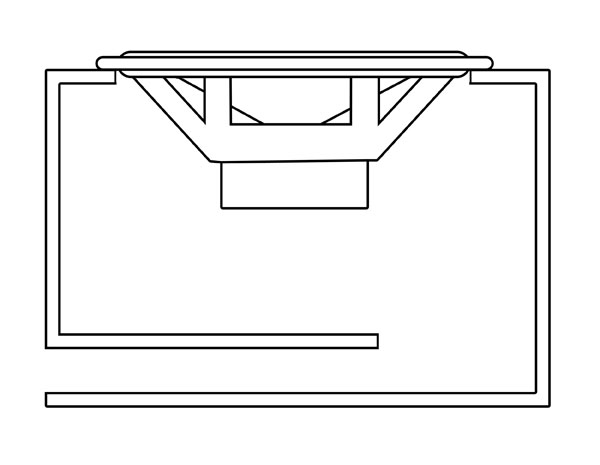
Step 3: Cut and Prepare the Panels
Use accurate measurements based on the internal volume your sub requires. Cut all panels for the box:
- Top
- Bottom
- Sides
- Front (with speaker hole)
- Back
Tip: If you’re adding a port or divider, factor those into your volume calculations.
Step 4: Glue and Screw the Box Together
A well-sealed box is a high-performing box. Here’s how to assemble it:
- Apply glue (like Liquid Nails) to each joint.
- Screw panels together using 2″–2.5″ wood screws spaced every 4 inches.
- Pre-drill holes to prevent the wood from splitting.
- Let the glue cure for at least 24 hours before installing the subwoofer—some glue fumes can damage the woofer.
Step 5: Add Internal Bracing and Optional Divider
If your box is larger than 12 inches in any direction, bracing is a must.
- Use 3″–4″ wide wood strips across the box interior to prevent flexing.
- Add corner blocks for extra strength.
- If you’re installing two subs, consider building a divider for added strength and speaker protection.
Step 6: Create and Install the Port (If Using a Ported Box)
If your box design calls for a port:
- Use PVC tubing—it’s strong, easy to cut, and available at any hardware store.
- Cut the port to the correct length and diameter.
- Cut a snug hole in the panel to insert the port.
- Use glue or caulk to seal the port in place.
- Add support braces if needed to keep the port secure.
Step 7: Add Acoustic Damping
To improve sound quality and efficiency:
- Line the inside with polyfill stuffing or fiberglass insulation.
- Polyfill is easier to work with and won’t irritate your skin.
- Damping material can improve low-frequency response and “trick” the sub into thinking it’s in a larger box.
- Test different fill amounts to fine-tune your sound.
Step 8: Finish the Exterior
Make your box look as good as it sounds.
If painting:
- Fill screw holes with wood filler.
- Sand the box smooth.
- Apply primer before painting.
If wrapping with carpet or vinyl:
- Cut fabric large enough to cover each side.
- Use 3M 77 or 90 spray adhesive—spray both surfaces and wait ~1 minute.
- Stretch the material and press it into place.
- Trim excess and staple the ends where possible.
Step 9: Mount the Subwoofer
Once the glue has cured and the box is finished:
- Cut the speaker hole (if not already done).
- Connect speaker wiring and mount the sub securely.
- Double-check for air leaks and fix any with sealant.
Calculate Box Specifications
Step 1: Enter Your Subwoofer Specs
- Vas (cu ft):
This is the subwoofer’s compliance volume, found in the manufacturer’s spec sheet.
Example:2.1 - Qts:
This is the total Q (damping factor) of the subwoofer.
Example:0.45 - Qtc (for sealed boxes):
This defines the system’s damping. Use0.707for flat response. You can raise it for tighter bass.
Example:0.707(default) - Number of Speakers:
Enter how many subwoofers you plan to install.
Example:1or2
Step 2: Choose Volume Unit
- Select whether you want results in Cubic Feet or Liters.
Step 3: Select Box Type
- Sealed: Tight, accurate bass. Easy to build.
- Ported: Louder bass with port tuning. Requires port diameter and tuning frequency.
- Isobaric: Two subs working together in smaller enclosure. Great for saving space.
- Bandpass: Advanced box type for specific frequency ranges. Design software recommended.
Step 4: (For Ported Boxes Only)
If you selected Ported:
- Port Diameter (in):
Common sizes: 3″, 4″, or 6″ - Tuning Frequency (Hz):
Typically between 30–40 Hz.
Example:33
Step 5: Click “Calculate”
The results will include:
Example internal box dimensions based on proportional ratios (1:1.25:1.5)
Recommended internal volume per sub and total
For ported boxes: Required port length
Choose Your Box Type Wisely
Depending on your goals and space, here are the types of enclosures you can build:
Subwoofer Enclosure Types: Know Your Options
1. Free Air
- Uses your trunk as the “box.”
- Not great for hatchbacks.
- Needs the trunk sealed from the cabin.
- Pros: Keeps your trunk space.
- Cons: Lower sound quality and efficiency.
2. Sealed Box

- Most common and easiest to build.
- Delivers clean, accurate bass.
- Box size must match the sub’s spec closely.
- Small box = tight sound, more power needed.
- Oversized = muddy bass.
3. Ported Box
- Bigger box with a tube (port) for more boom.
- Boosts bass by 3–4 dB.
- Must be built to exact specs.
- Not as linear; may emphasize certain frequencies more than others.
4. Isobaric Configuration
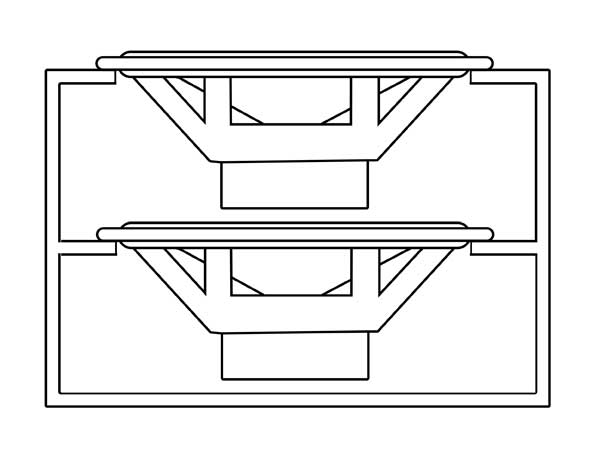
- Two subs face each other in a smaller sealed box.
- One is wired in reverse (out of phase).
- Pros: Saves space.
- Cons: Doesn’t increase output much and exposed woofer is vulnerable.
5. Band Pass
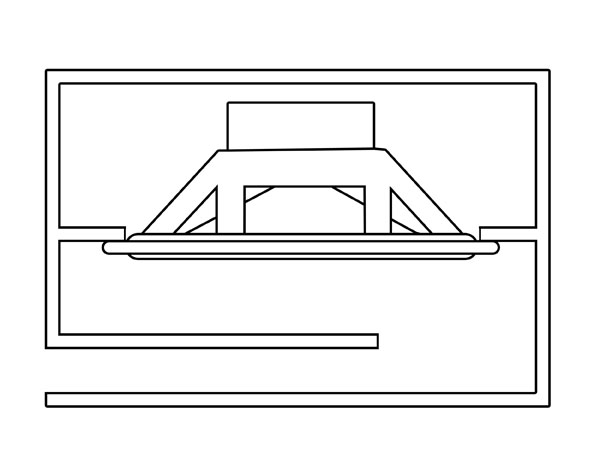
- Sub is placed between a sealed and a ported chamber.
- Loud bass in a narrow frequency range.
- Doesn’t need a crossover.
- Very sensitive to build accuracy.
- Can hide distortion—which can lead to blown subs.
| Type | Pros | Cons |
|---|---|---|
| Sealed | Tight, accurate bass; easiest to build | Requires more power for loud output |
| Ported | Louder bass; more efficient | Bigger size; must be precisely tuned |
| Isobaric | Saves space | Complex wiring and mounting |
| Band Pass | Huge bass at narrow frequency | Large and unforgiving if built wrong |
| Free Air | Keeps trunk space | Low accuracy and power hungry |
Key Subwoofer Parameters Explained
Vas (Equivalent Compliance Volume)
What it is:
Vas represents the amount of air volume (in cubic feet or liters) that has the same compliance (springiness) as the subwoofer’s suspension.
Why it matters:
It helps determine the ideal box size. A higher Vas means the sub works best in a larger box; a lower Vas means a smaller box.
Typical values:
- 8” sub: ~0.5 – 1.2 cu ft
- 12” sub: ~1.5 – 3.0 cu ft
Qts (Total Q Factor)
What it is:
Qts is a measurement of the subwoofer’s damping, or how it controls motion. It’s calculated from mechanical and electrical losses (Qms and Qes).
Why it matters:
It affects how the sub will perform in different types of enclosures:
| Qts Value | Best Box Type |
|---|---|
| 0.2–0.4 | Sealed or small boxes |
| 0.4–0.7 | Ported or larger boxes |
| > 0.7 | Free air / IB setups |
Tip:
Lower Qts = more control. Higher Qts = more natural low-end but less control.
Qtc (Total Q of the System)
What it is:
Qtc is the system’s damping when the sub is installed in a sealed box. It represents the interaction between the sub and the air spring inside the enclosure.
Why it matters:
Qtc determines the sound quality and tightness of the bass.
| Qtc Value | Sound Characteristic |
|---|---|
| 0.5 | Very tight, low extension (under-damped) |
| 0.707 | Flat, balanced sound (critically damped – best all-around) |
| 0.9+ | Boomier, more pronounced bass (over-damped) |
Bonus: Consider an Amplified Bass Tube or Custom Box
If space is tight or you want a simpler install, here are two options:
Custom Fit Boxes: JL Audio and MTX offer enclosures for under seats, consoles, and trunks. More expensive, but top-tier in both form and function.
Wrapping It Up
Amplified Bass Tubes: Compact, all-in-one solutions. Brands like Bazooka® are easy to install and sound decent in small vehicles.
Building a subwoofer box takes patience, but the payoff is huge: better bass, a clean install, and the satisfaction of doing it yourself. Just remember:
Match the box to your sub
Seal it tight
Brace for strength
Finish it clean
Once you’re done, crank up your favorite track—you’ve earned it.
If you are working on a Blow Through on your truck you will need an accordion boot to fill the gap between the truck bed and passenger cabin. For information on creating the pass through check out this post Cut Through FAQ
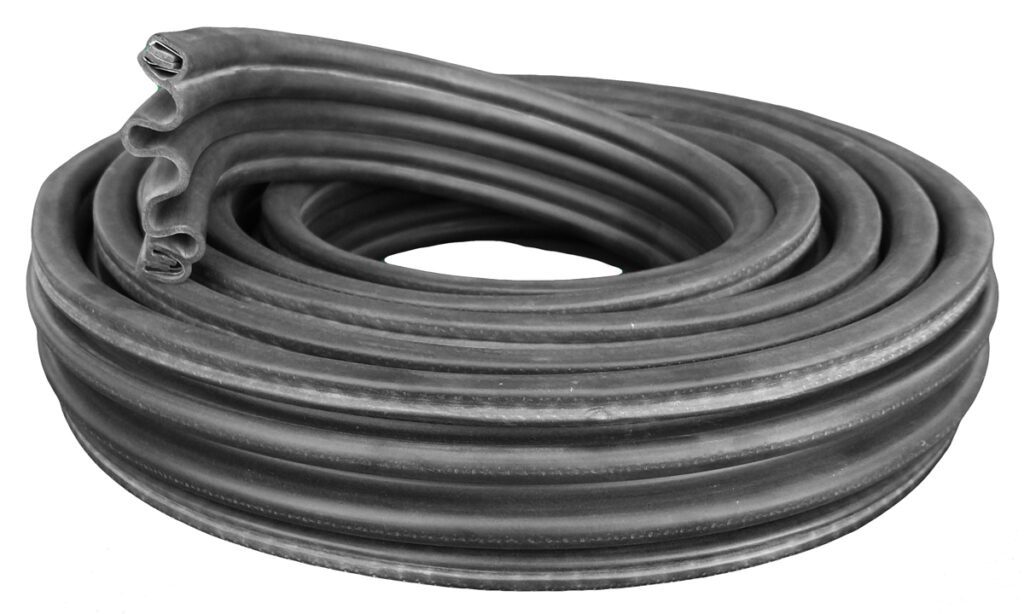
Rubber Boot Seal
You can order rubber boot material for your special project requiring pass through access. These seals are extruded from a durable EPDM synthetic rubber compound and incorporate a flexible spring steel clip for attachment to any flange. This material is sold by the foot.
Image by Bruce from Pixabay Carpentry, Hobby, Work bench image